
Making of Early – Getting Started with Siri Shortcuts
Let’s start this post by quoting Apple from WWDC 2018
Siri Shortcuts are a powerful new feature in iOS 12 that allow your app to expose its functionalities to Siri. This enables Siri to suggest your shortcut at relevant times based on various context.
With this new feature, apps get a new dimension – voice. Also, they automatically “become smarter”, by showing up on Spotlight right at the time you might think of them.
So, in this tutorial, I’ll show you how quickly you can implement shortcuts in your app using NSUserActivity – with literally 2 blocks of code.
I’ll walk you through some steps we took to expose some of the most valuable features of our favorite app to Siri.
Short intro – the back story for our example
Early Game Alarm is an alarm clock app, that won’t stop ringing until the user wins a simple game. Users can also play games whenever they want, even without the alarm. To do that, without fancy new shortcuts, they have to:
-
Start the app
-
Go to the screen where all the games are listed
-
Scroll to their favorite one
-
Press “Play”
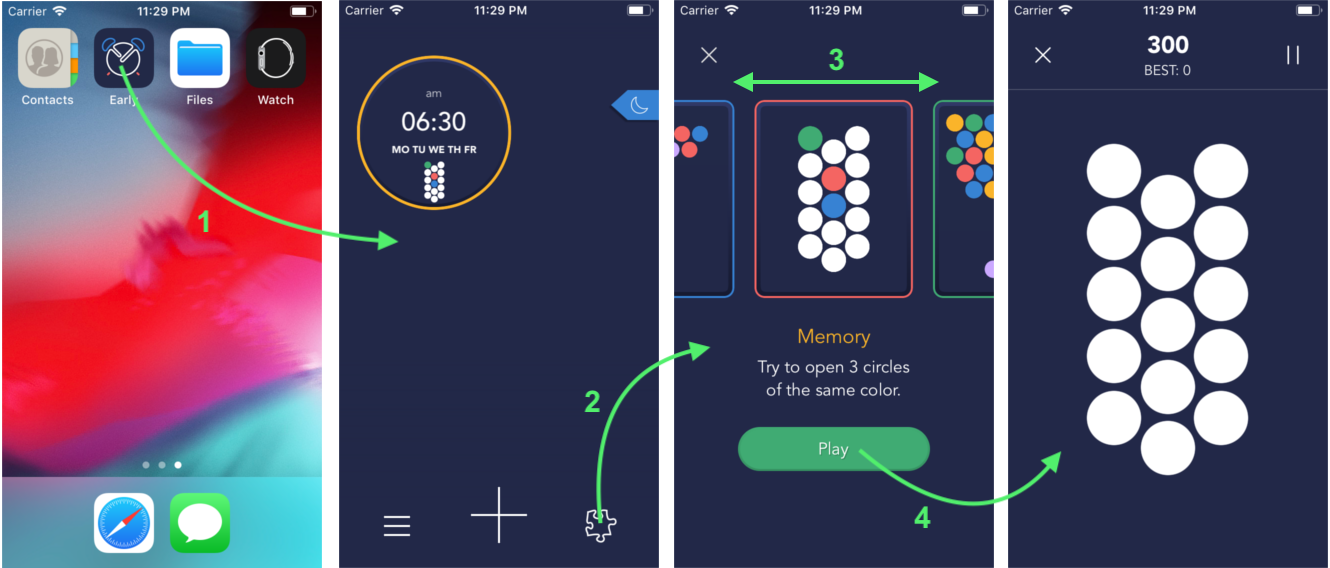
But with shortcuts, they would be able to use just their voice, or type the game name in search. So, let’s dive into the code!
The first step is to make a user activity and to donate it at the appropriate time.
// GamesSelectionViewController.m

// 1. Make activity
- (void)donateActivity {
   NSUserActivity *activity = [[NSUserActivity alloc] initWithActivityType:@"com.your_appname.game_activity"]; // A
   activity.title = [NSString stringWithFormat:@”Play %@”, self.selectedGame.name]; // B
   activity.eligibleForSearch = YES; // C
   activity.eligibleForHandoff = NO; // C

   if (@available(iOS 12.0, *)) {
       activity.eligibleForPrediction = YES; // C
   }

   [activity addUserInfoEntriesFromDictionary:@{ @”gameID”: self.selectedGame.id }]; // D
   self.userActivity = activity; // E
   [self.userActivity becomeCurrent]; // E
}

// 2. Donate it at the appropriate time - when play button is pressed, before we actually start playing the game.
- (IBAction)playButtonTapped:(UIButton *)sender {
   [self donateActivity]; // F
   [self playGame:self.selectedGameID];
}
Let me explain the code briefly.
-
When creating a new user activity, it is important to give it a unique identifier – so you could later respond to different shortcuts in different ways.
-
We should also set a nice, user-friendly title for it, so users will be able to understand what it does when they see it apart from our app – in this case “Play GAME_NAME” (e.g. Play Memory, Play Tennis, etc.) will do just fine.
-
The next couple of lines are pretty straightforward: we set what we want our shortcut to be eligible for. Our app, for example, doesn’t support handoff, so we set that to NO.
-
We pass the data necessary for a shortcut to work using UserInfo dictionary. In our case, we have a lot of games in the system and we need to know which one the user had started – so we are passing the gameID.
-
“Donating” User Activity to the system. We mark the activity as currently in use by the user. Why? Imagine it like logging and tracking statistics. So the system knows at what times you usually play which game.
-
We are calling this function at the appropriate time – every time the user starts a game.
To test this, all we have to do is start a couple of games a couple of times (invoke our activity a couple of times). And as you might have guessed, nothing should change in the app.
But if you go to the Spotlight, or try searching for your activity, you should see it in suggestions and search results.

If it does not appear in suggestions right away – try starting the activity couple more times. Remember, your iPhone tries to suggest you things at relevant times based on your phone usage. And since it is the first time it picked up your activity, it may not consider it relevant just yet.
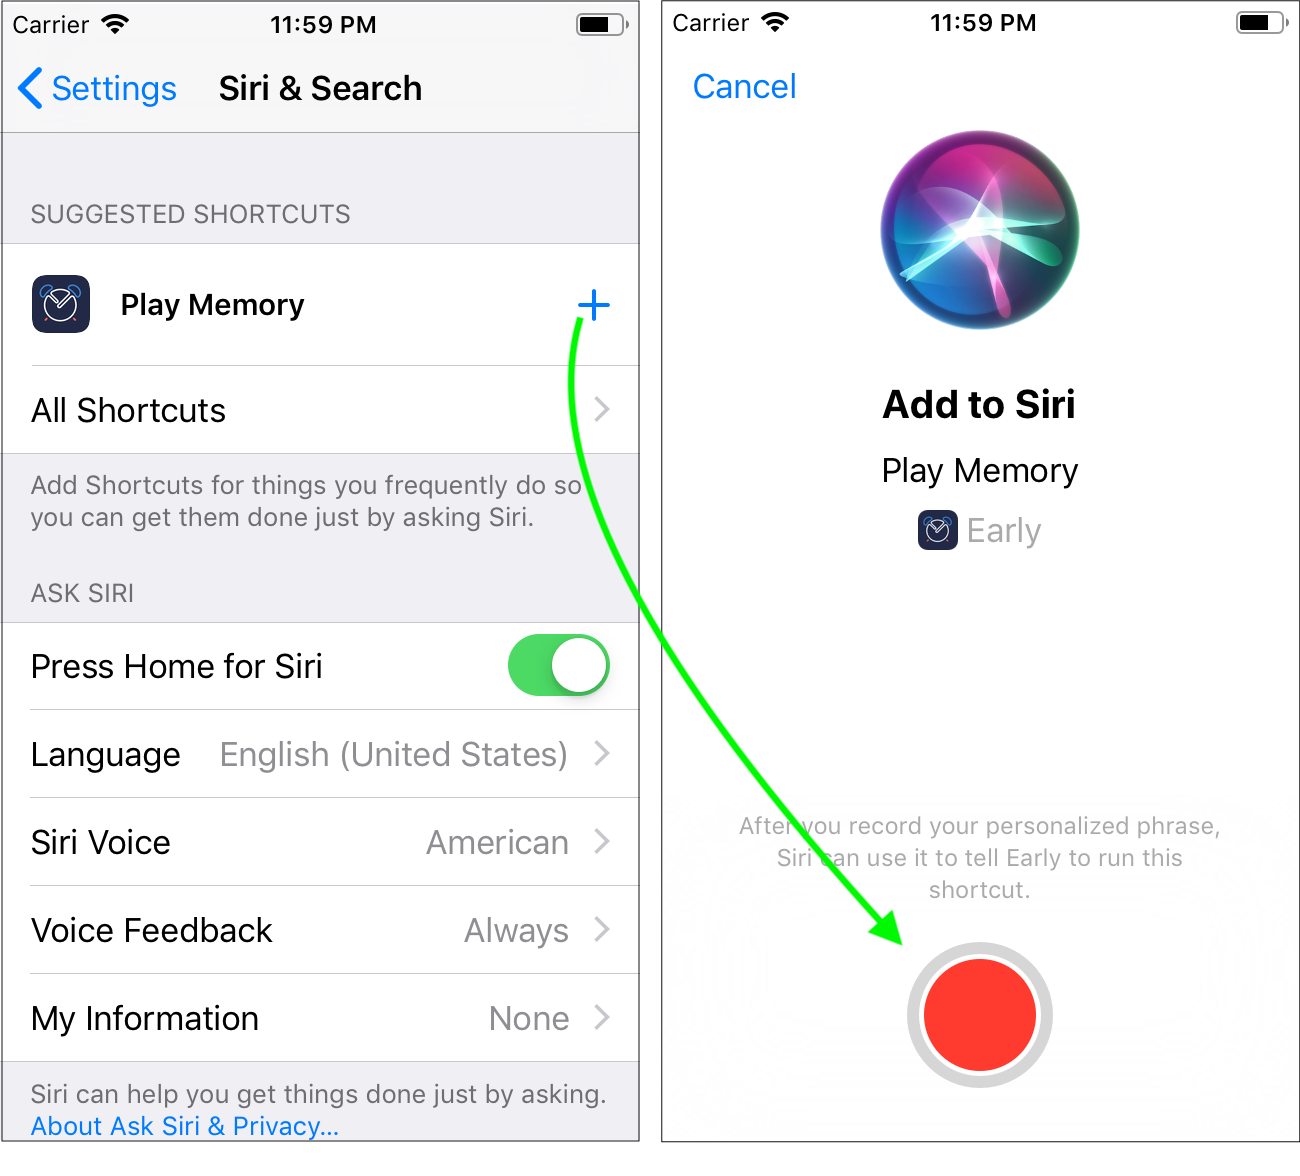
If you still cannot find your shortcuts in the Siri settings, go to Developer settings (they appear in Settings when your phone is connected to your Mac) and enable “Display Recent Shortcuts”.
You can also go to Siri Settings and try to record your own phrase for the shortcut.
The second part is about handling what happens when the user taps on the shortcut.
// AppDelegate.m

- (BOOL)application:(UIApplication *)application continueUserActivity:(NSUserActivity *)userActivity restorationHandler:(void (^)(NSArray<id<UIUserActivityRestoring>> * _Nullable))restorationHandler { // A
   if ([userActivity.activityType isEqualToString:@"com.your_appname.game_activity"]) { // B
       NSNumber *gameID = [userActivity.userInfo valueForKey:@"gameID"]; // C
       UIStoryboard *storyboard = [UIStoryboard storyboardWithName:@"Main" bundle:nil];
       GameViewController *viewController = (GameViewController *)[storyboard instantiateViewControllerWithIdentifier:@"GamesViewControler"];
        viewController.gameId = gameID; // D
      [self.window.rootViewController presentViewController:viewController animated:YES completion:nil];

       return YES; // E
   }
}
Let me again just briefly explain the code.
-
We use AppDelegate’s
application:continueUserActivity:restorationHandler:function to react when the user taps on the shortcut – to continue with the specified activity in our app
-
First, we need to check the activity type.
-
Then, we read data stored in UserInfo dictionary.
-
We instantiate the appropriate View Controller and pass it the data.
-
We return YES – to indicate that the app has responded to shortcut.
The only thing left to do is declare activity types our app supports in Info.plist file.
<key>NSUserActivityTypes</key>
<array>
  <string>com.your_appname.game_activity</string>
</array>
With this done, we can just activate Siri, say our phrase, and voila! The game started.
This is definitely the simplest way to make a Siri Shortcut for an app. It is great because it is lightweight and straightforward and allows you to implement cool new iOS features in your app very quickly. However, it is very limiting – all it allows you to do is to start your app in a specific context. It cannot work in the background.
For background changes, more complex features, and rich user experience within Siri, NSUserActivity cannot be used. For that, we have SiriKit and Intent Extensions.
There are a lot of great step-by-step tutorials on both subjects, these are just some of them that I (can think of right now to) recommend:

